Monday, June 20, 2016

Shadow Box Frame.

Shadow Box Frame

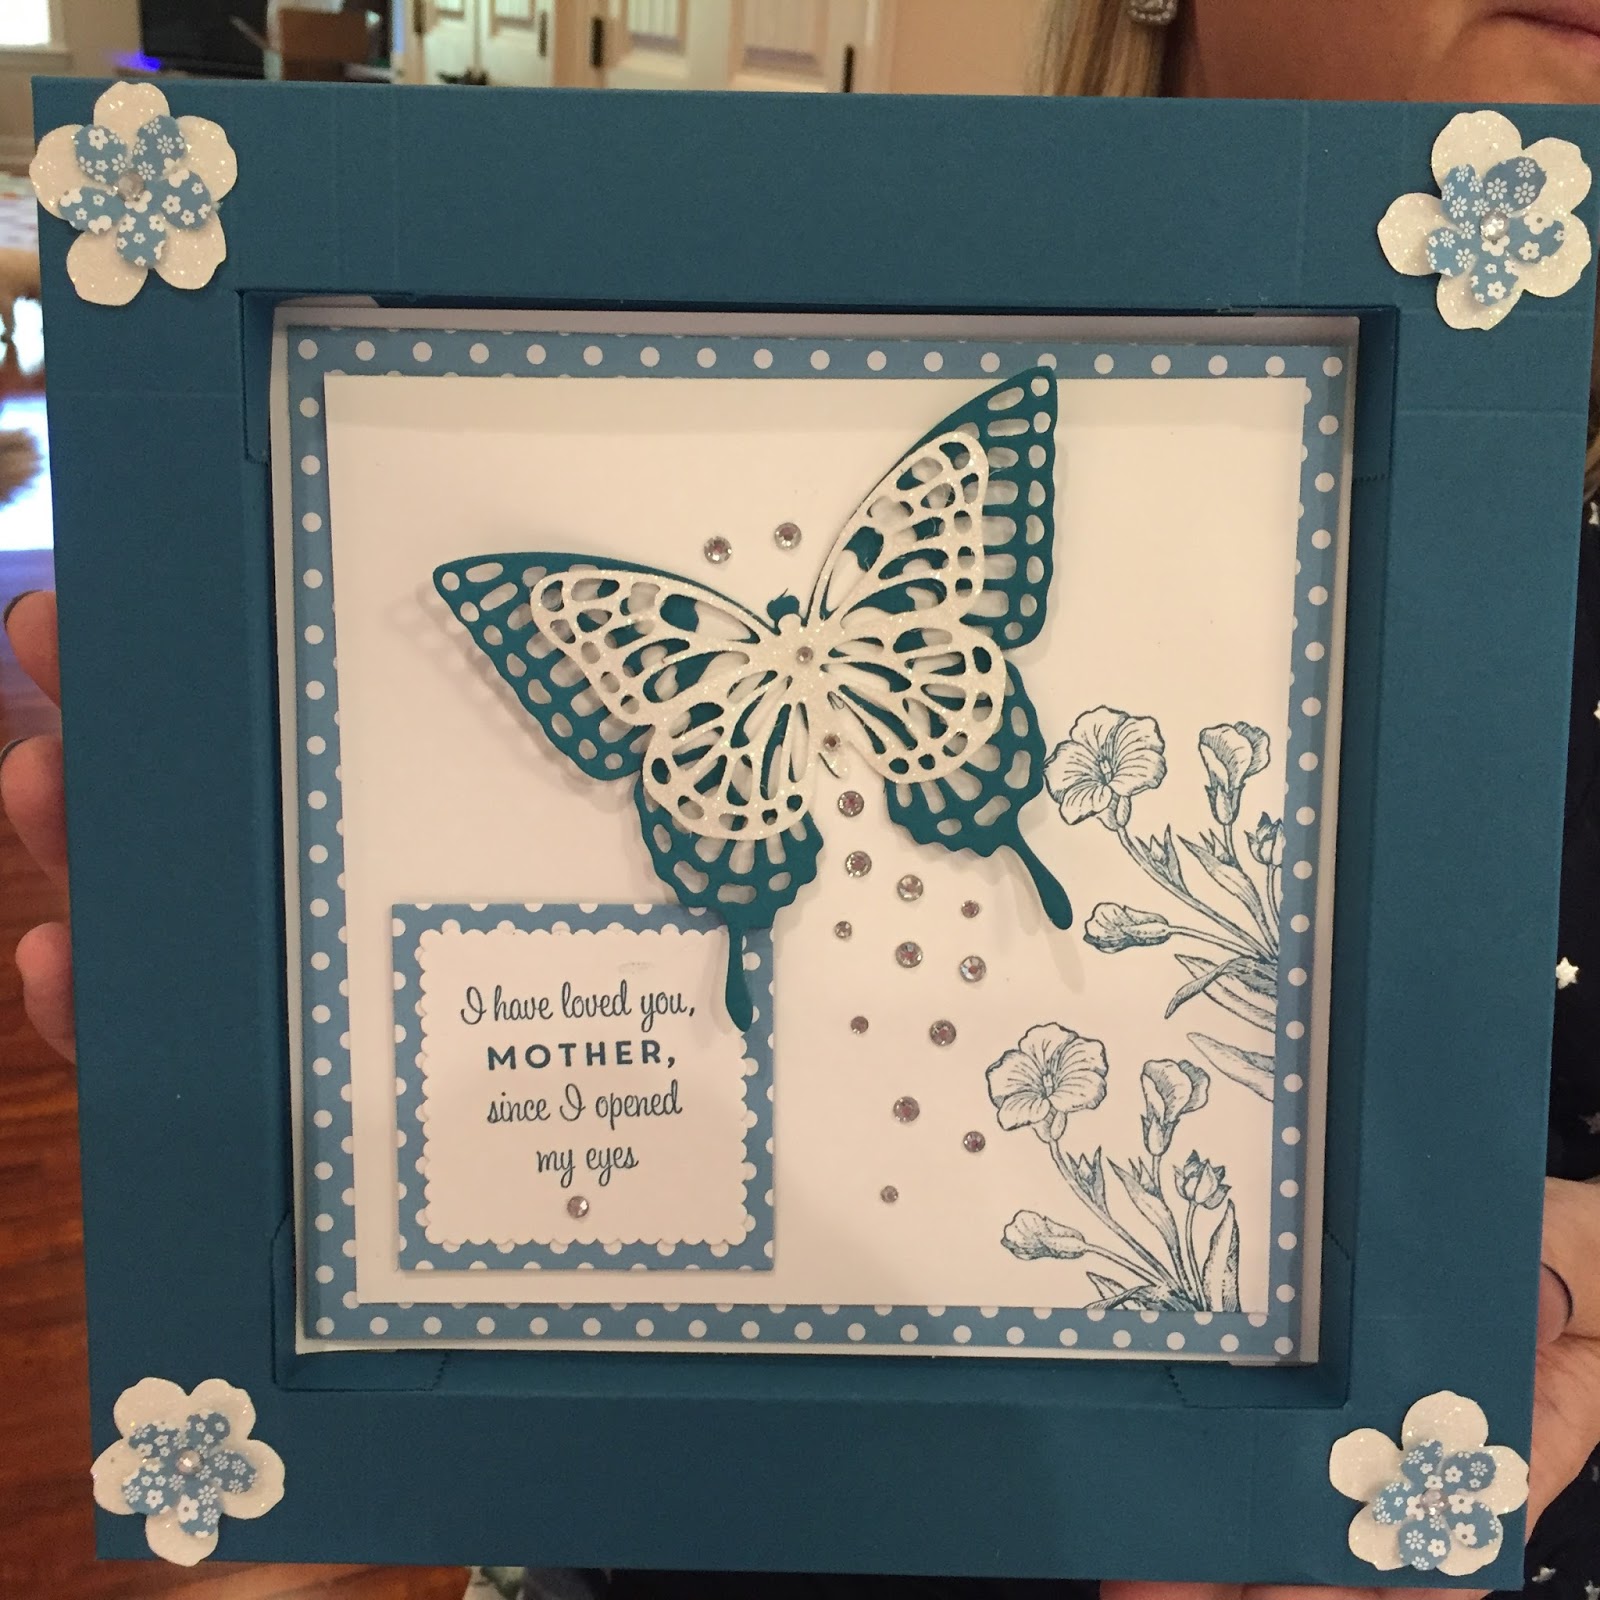
The Shadow Box Frame is easy, fun and can be use in is so many ways.


Supplies:

1 - 12 x 12 Card stock (or you can use
            thick paper stock.)
1 - 9 3/4 x 9 3/4 heavy cards stock (great               
            place to use the cardboard that
            comes in the back of your DSP.)

1 - 7 1/4 x 7 1/4  Paper or Cards stock

1 - 7 x 7 Paper or cards stock


1-  6 3/4 x 6 3/4 cards stock.

Plus you will need your inside embellishments. Skies the limit.

First score your 12 x 12 card stock or thick paper at 1/2, 1 1/8, 2 3/8 and 3 on all 4 sides. Now with a pencil mark off blocks the 4 corners. In the example below you will cut off the "x" and the "T" will be a tag. Repeat in all 4 corners.


 _____________
XX            XX 
XT            TX


XT            TX
XX______XX

Next, make an "X" in the middle of your paper crossing over the first score line closes to the center. Using you straight edge, create a box around the center "X", large about 3 1/2 inches. Now cut on each line. When you are finished you will have 4  triangles, (do not discard). Fold on each of the score lines using your bone folder.


Fold your tag in and adhere to form all 4 corners.

Measure your 9 3/4 x 9 3/4 to be sure it is not too big. IF it is a tiny bit small that is okay, but if it is too big you need to trim it down now. Adhere the backing to the bottom, being sure the 1/2 inch scored section is folded to the inside.

Now let's work on the top side. Fold and adhere the inside pieces down. Be sure the inside edges are square. You can do this with any straight edge, just stand it up to be sure the inside flap is not pushed too far back or too far forward.


You are ready to embellish the inside of your frame.


Here are some other Shadow Boxes that were completed in the class. A special thank you to the group for letting me share how creative they are.


To get your supplies for this project, come shop with me at     ElainePelletier.stampinup.net

Sunday, June 19, 2016

Adult Coloring Books Continued.

Thank you everyone for all the great responses to my Adult Coloring Book post. I will be happy to show you some other ways to enjoy adult coloring. Stamping the imagine, is only a small part of designing your own coloring pages. As previously stated it is important to use the right ink and marker combination.

I have designed a few coloring cards mounted and are complete, except for the actual coloring. Now I can mail my favorite card to to someone one that enjoys coloring. They can enjoy coloring their own card. In some situations, I send the uncolored card to a friend that likes to color with a posted note inside with the message. "A card that keeps on giving. Color this card and send it to another friend to enjoy." Here is an example: 


As you can see the top cards are finished. It's the unfinished ones I mail the my friends that love to color. 

Stampin Up offers lots of ideas for adult coloring. Come join me again as I use more of our new catalog stamps for coloring. You can make your own color cards too, come shop with me. 

http://www.stampinup.net/esuite/home/elainepelletier/

 Thank you for your support. 

Elaine

Tuesday, June 7, 2016

One Day Deal You Do Not Want to Miss
One-Day-Deal-thumbnail-US


Use Promotion code: ONEDAYDEAL
 
For 31 hours only, first-time subscribers can get their first kit for just $5 USD/$7 CAD! This “one day deal” starts at 7:00 PM EST on Thursday

Details
This offer is open to first-time subscribers only. Discount applies to one kit for June 2016. After the first month, the price for the subscription will return to $19.95 USD/$26.95 CAD.
  • Offer starts on Thursday, June 9 at 7:00 PM (EST) and ends Friday, June 10 at 9:50 PM (EST).
  • Available for month-to-month subscriptions, not prepaid subscriptions.
  •  
  •  Come shop Paper Pumpkin with me at 
  • www.mypaperpumpkin.com 
  • Use Dealer name Elaine Pelletier  Raleigh NC 27614
  •  
  • Thank you for your support.